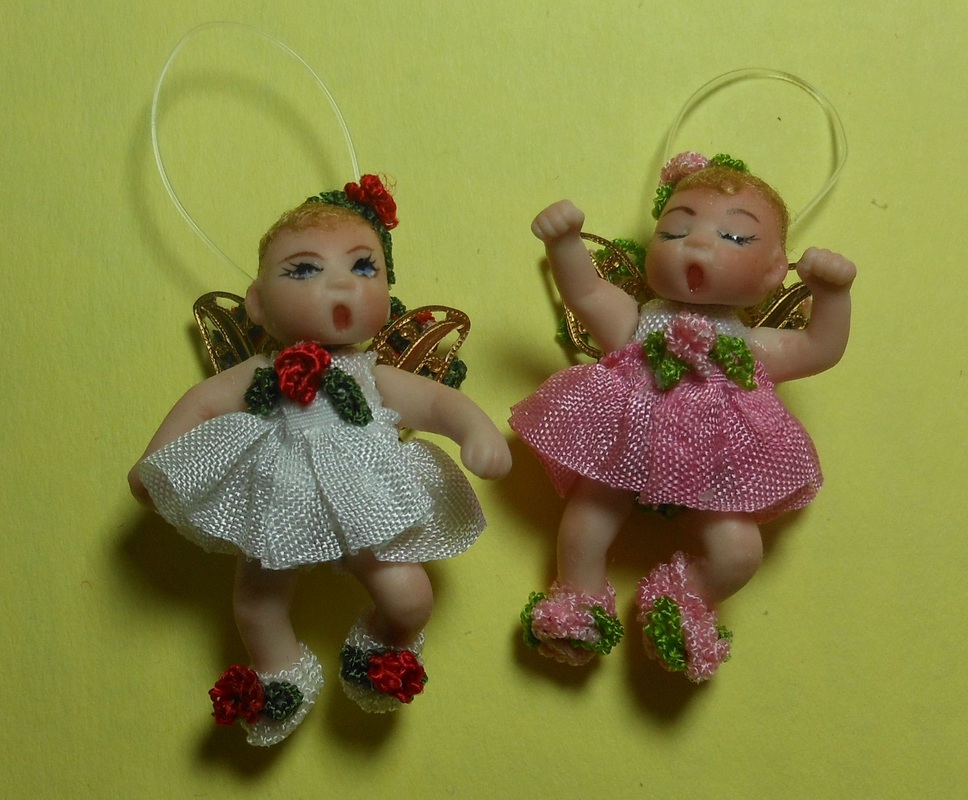
A Tiny Christmas Fairy
Supply List:
Belly Button Baby, 10” White Seam Binding, 12” each of White, Green & Red Bunka (raveled), Wing Finding 1 3/16” X 7/8”, 3” piece of Heavy Fishing Line, Aleene’s Tacky Glue and Super Glue Gel
Cut two 1” pieces of seam binding and one piece 1.5” and slather glue on one side of each of these three pieces. Lay flat to dry. One of the 1” pieces will be used for sides of the bodice and the other for the panties. The 1.5” (1 ½”) piece will be your main bodice piece.
acing>Slip the pencil back into the sleeve and fold the piece to where both front sides are facing each other down the seam line. Tack with matching threads about 1” or so to let the sleeve drape on the hanger. Do the same for both sleeves.
|

|
|

|
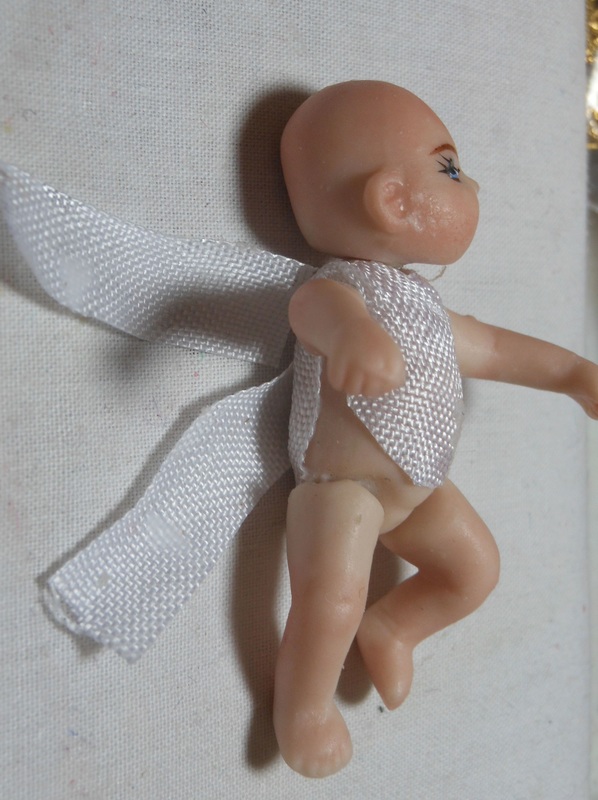
Bodice: Take the 1.5” pc. of seam binding and slather glue on one side of it. While glue is wet, cut up the center of the piece about half way and then proceed to cut a small triangle out of the very middle of it (this is the neck opening of the bodice). Place front of bodice on baby’s chest and wrap back over shoulders and down back. Clean up excess glue as you go along throughout this tutorial.
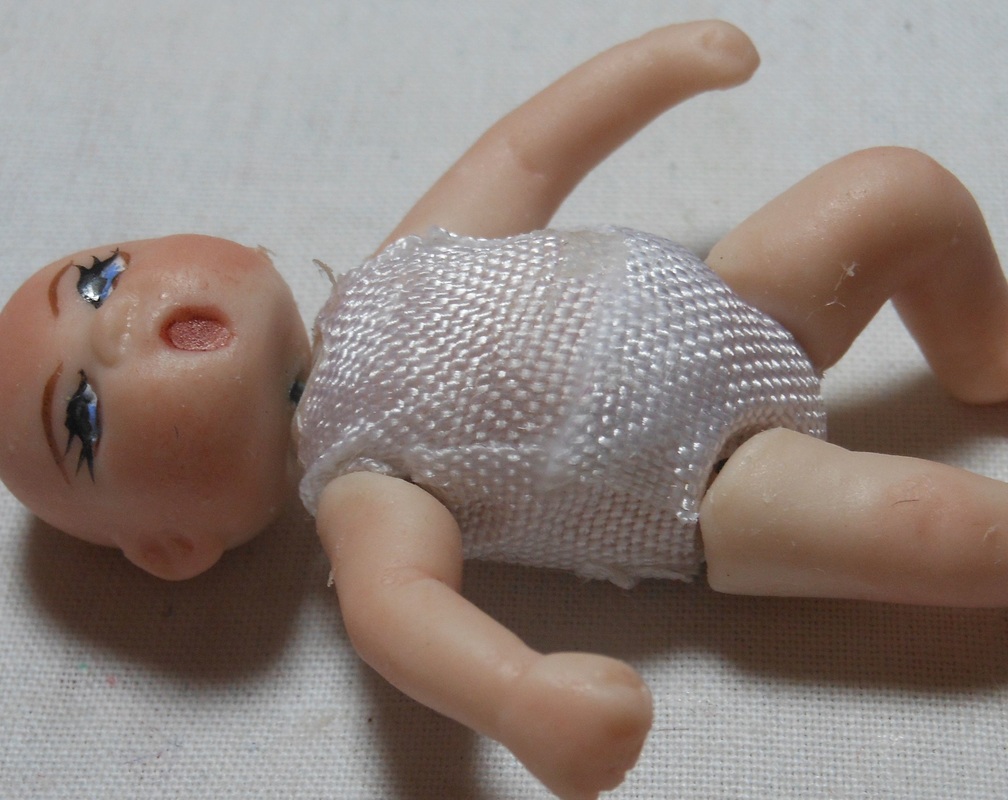
Using one piece of the previously prepared seam binding cut off any strings or fraying edges and then cut the piece in two. Using one of these cut pieces, cover it with glue again and fit it just under the right arm. Cut off extra just above the leg. Do this to both sides of the baby. These pieces should wrap over the front and back pieces already on the baby. If the seam binding is covering the arms, gently move the arms around and over so that you can push the fabric into the armhole area. Smooth the seam binding as you work.
Using one piece of the previously prepared seam binding cut off any strings or fraying edges and then cut the piece in two. Using one of these cut pieces, cover it with glue again and fit it just under the right arm. Cut off extra just above the leg. Do this to both sides of the baby. These pieces should wrap over the front and back pieces already on the baby. If the seam binding is covering the arms, gently move the arms around and over so that you can push the fabric into the armhole area. Smooth the seam binding as you work.

|
|
|
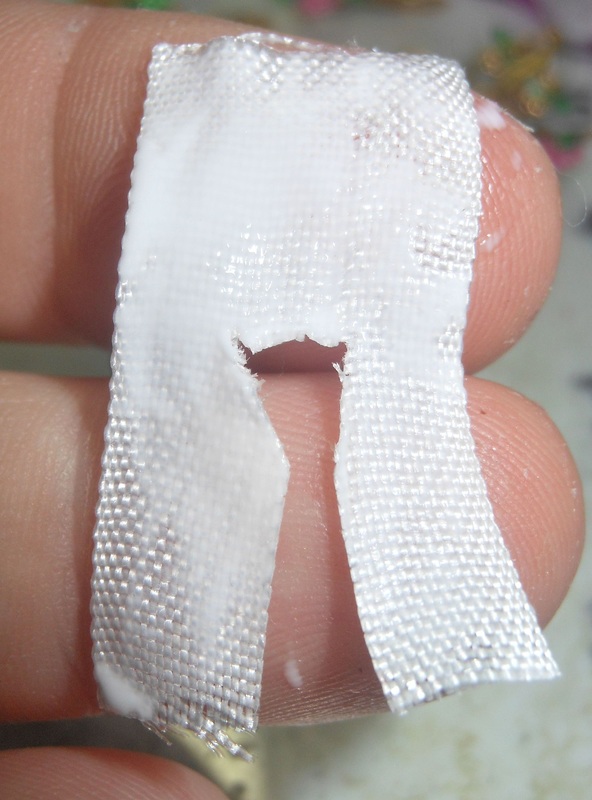
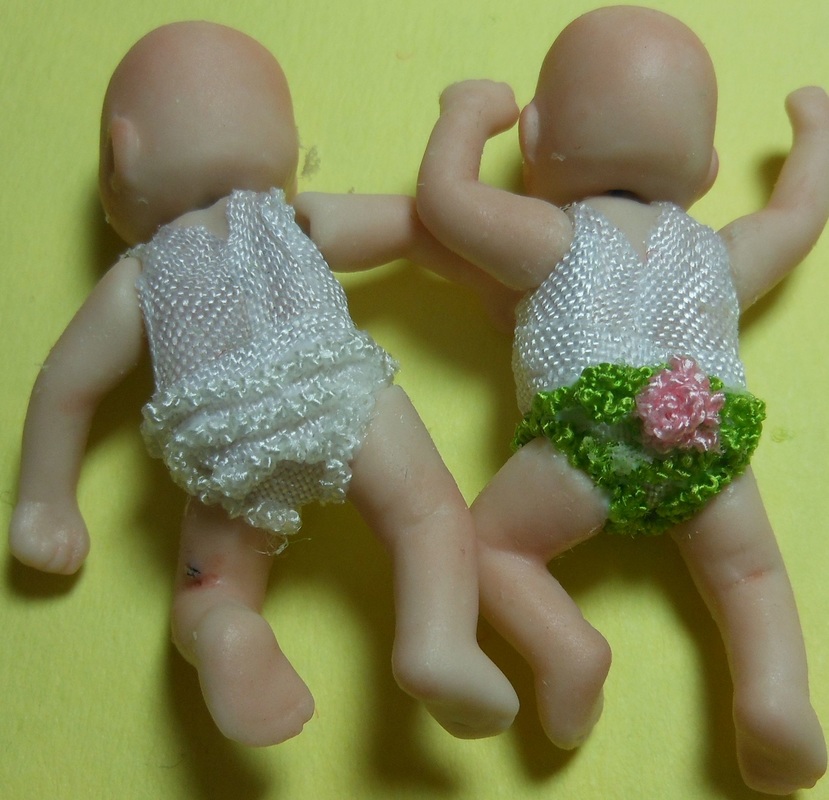
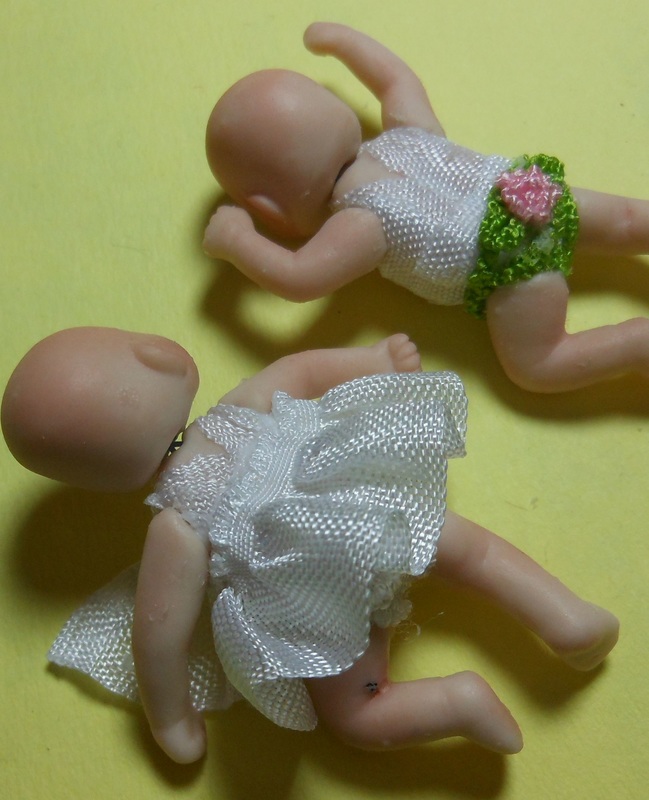
Panties: Fold the last piece of seam binding in half long ways. Carefully cut a long “U” shape beginning approximately ¼” from the top and ending ¼” from the bottom to make the panties for our baby. Slather glue all over the glued side again and place it on the baby wrapping it from front to bottom to back as panties would fit a child. Smooth fabric to go under the legs and trim if necessary. Set it aside to dry. Add two or three lines of glue across baby’s butt near the bottom to put ‘ruffles’ of pulled bunka on. You could also add a bunka flower here later if preferred. Glue the bunka from one leg to the other and cut off. Place glue around a leg and press pulled white bunka into glue. Do both legs the same.

|

|
|
|
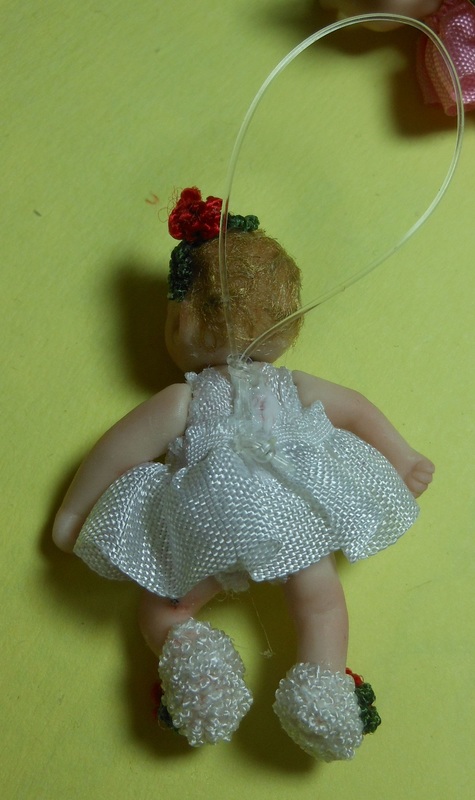
Booties: Slather glue all over one foot of your baby up to mid ankle. Wrap pre-raveled bunka onto this glue base to cover the entire ankle, foot, and sole. Top with a bunka rose if desired.
.
.
|
|
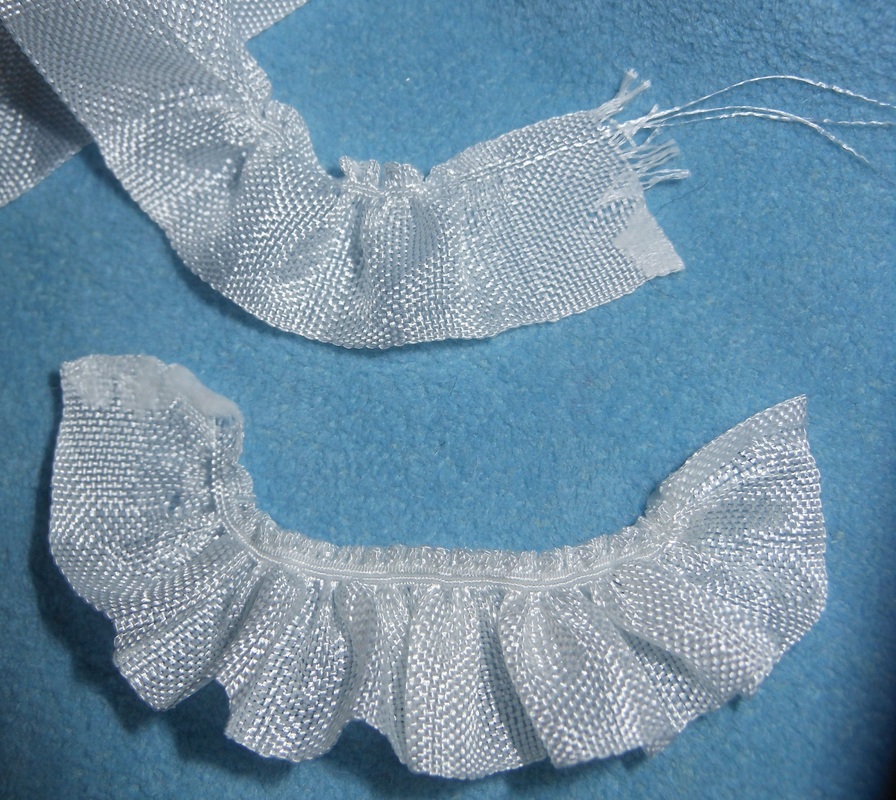
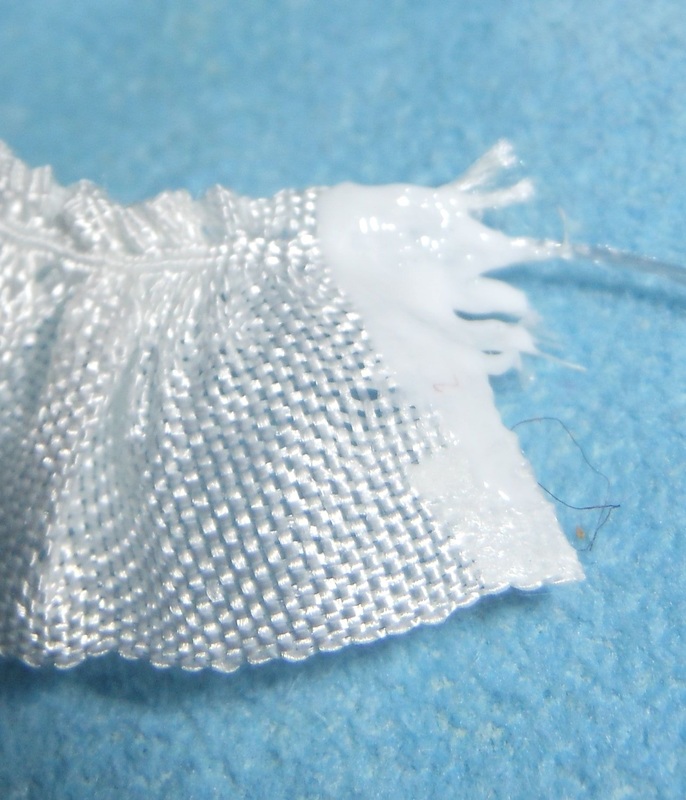
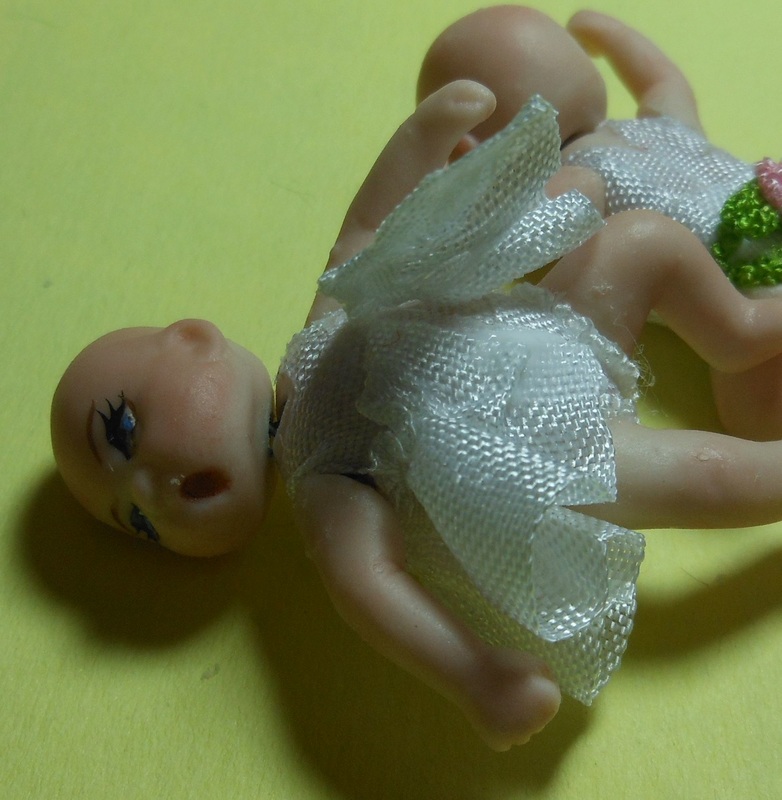
Skirt: Take a 6” piece of seam binding and glue a tiny hem in one of the short ends of it. On the other short end, you will need to unravel a bit of it to expose the threads you will pull to ruche the skirt to gather. (See photos) Make another tiny hem on this side but only on the bottom half of it leaving the threads exposed you will pull. Try to grasp 3 threads with your finger nails or with tweezers and gently pull them out sideways. Once you have your three threads, pull them gently while sliding the fabric toward the first glued hem to gather the skirt. Do it slowly and gently so you do not break your pulling threads. Once the gathers are tight, fit to baby’s body and glue the 2nd half of the hem down to keep gathers from unraveling. Place a line of glue around your baby’s chest above her waist and just under each arm all around her body. (Note: I changed my original idea here so that I would be able to hang my little fairy baby instead of laying her on a ‘cloud’) Place one side of the skirt at the center of her back (instead of her front) and then glue down all around baby to join with the first hem. Glue hems together so closure will be at center back. If you wish to lay her on a ‘cloud’ instead: glue the first part of her skirt on her chest at the center and glue skirt around to meet again at beginning skirt hem. Glue hems together and let dry. To make a ‘cloud’ simply grasp a small bit of polyester fiber fill and gently pull it until you have what resembles a ‘cloud’ to lay your fairy baby in.

|
|
|
|
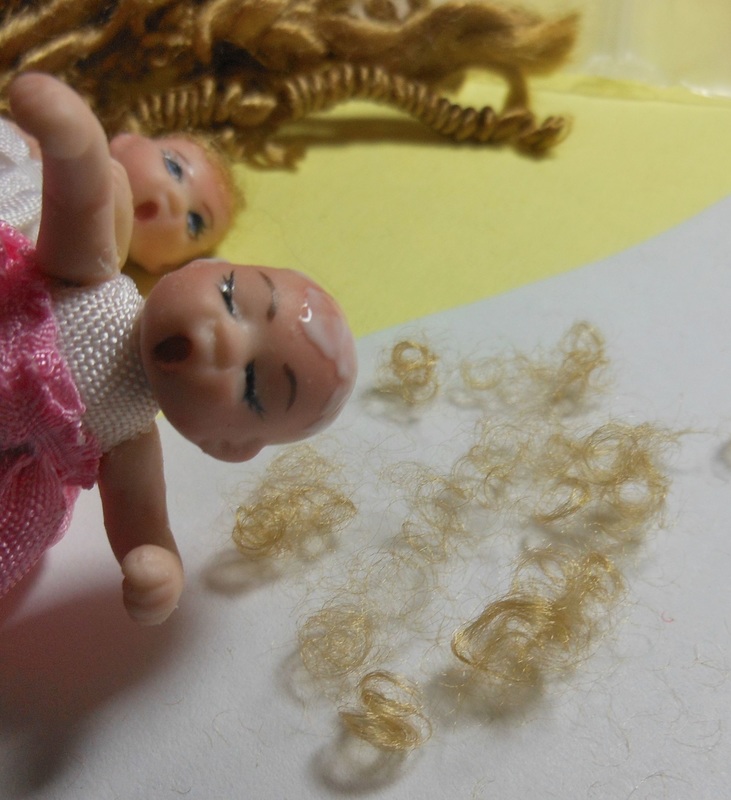
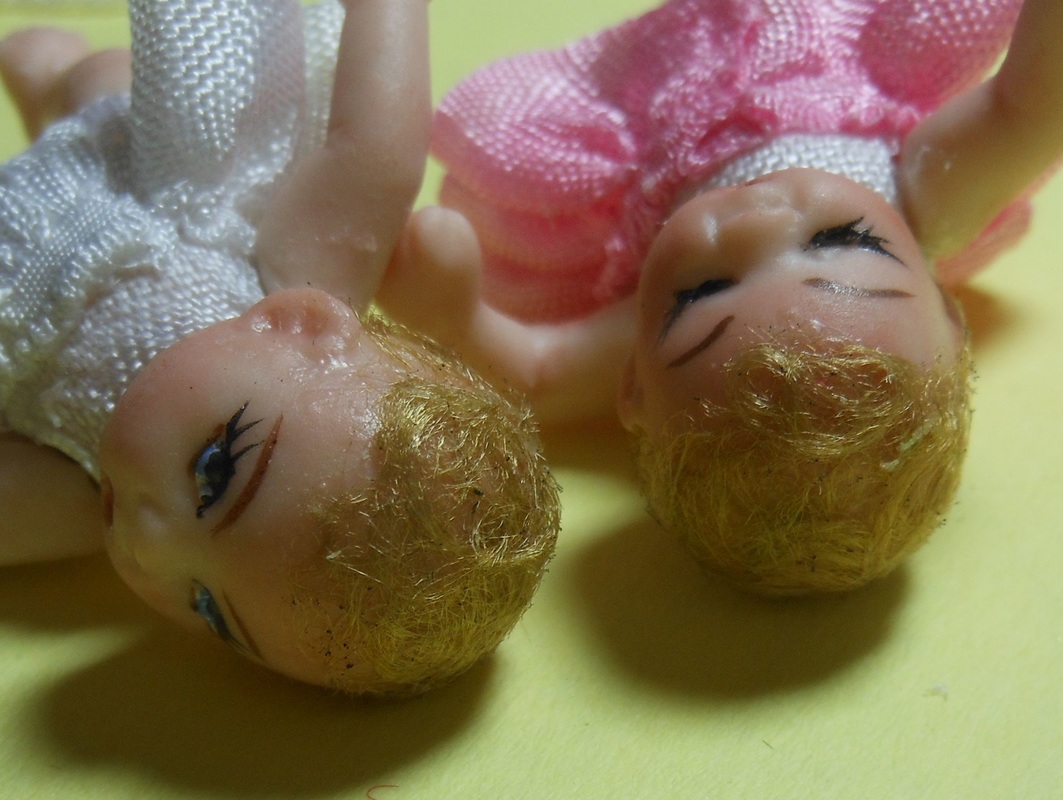
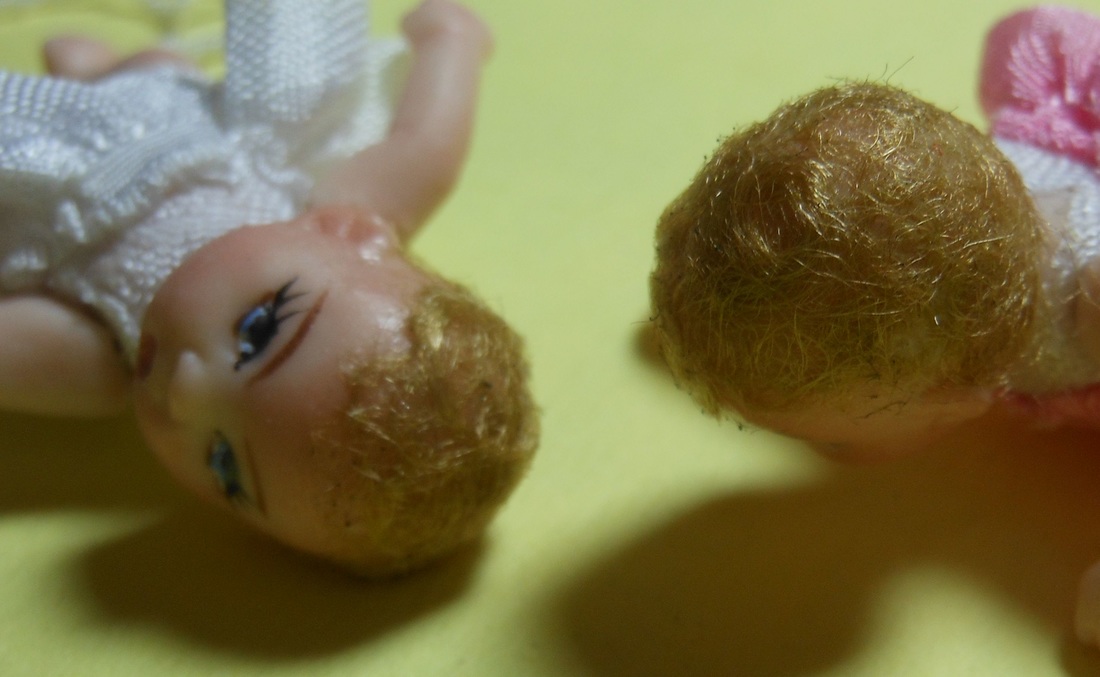
Wig: Take a small curl of Viscose and spread it out. Clip sections of ¼” and be sure to have enough for the baby’s head. Babies have less hair than older children and adults so be sure to not make the wig too thick, just a light coating will do. Slather glue onto the baby’s head at the back and on top and near front in a natural hair line. Let the glue tack up for a minute and then begin adding a bit of hair into the glue and pressing down gently. Continue to add hair all around the head and press in. Set aside for a couple of minutes and let it dry completely. Once the glue is dry, you can run the head over an open flame (I use a cig. Lighter) and take off all the tiny wispy fly away hairs left on baby’s head. You might also try to wet you finger and rub over the head to lay the hairs down. Brush off any ash remaining.
|
|
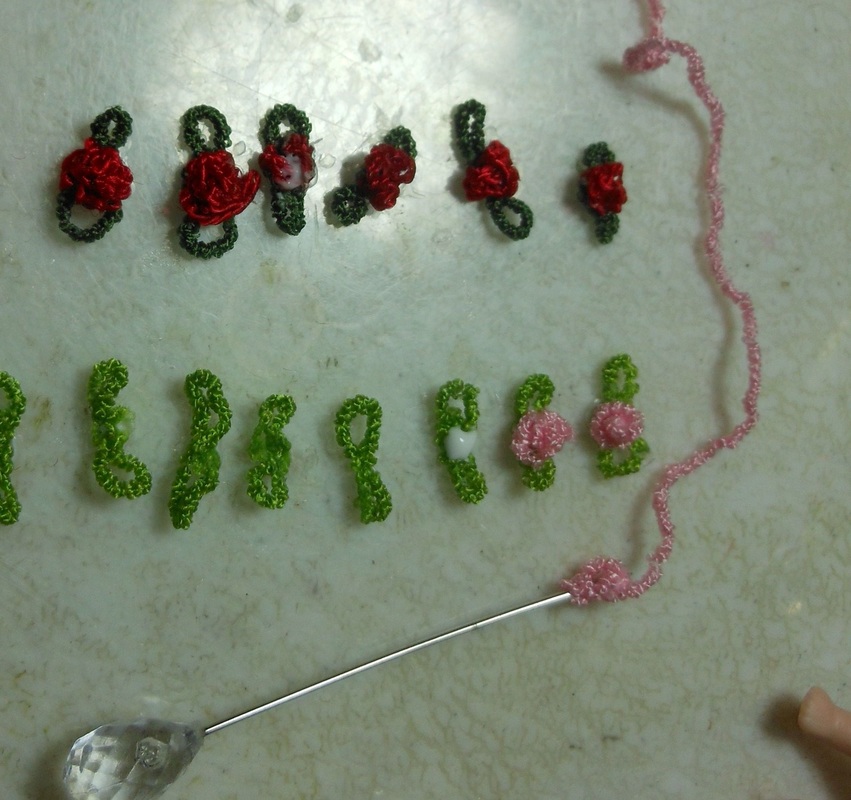
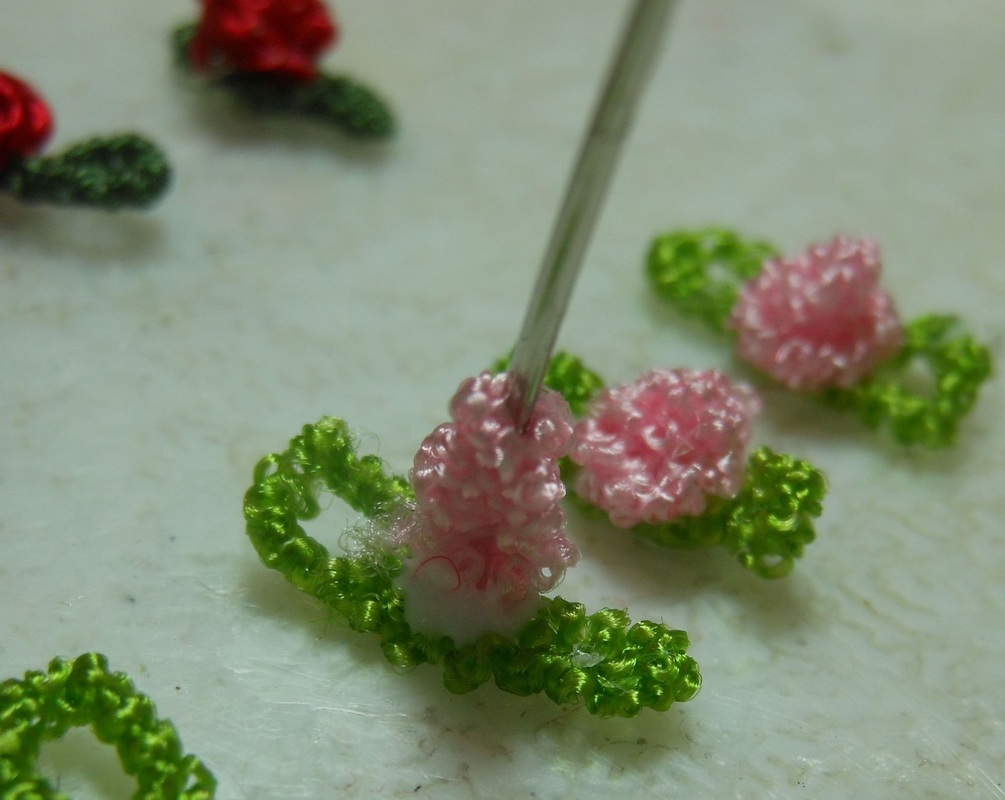
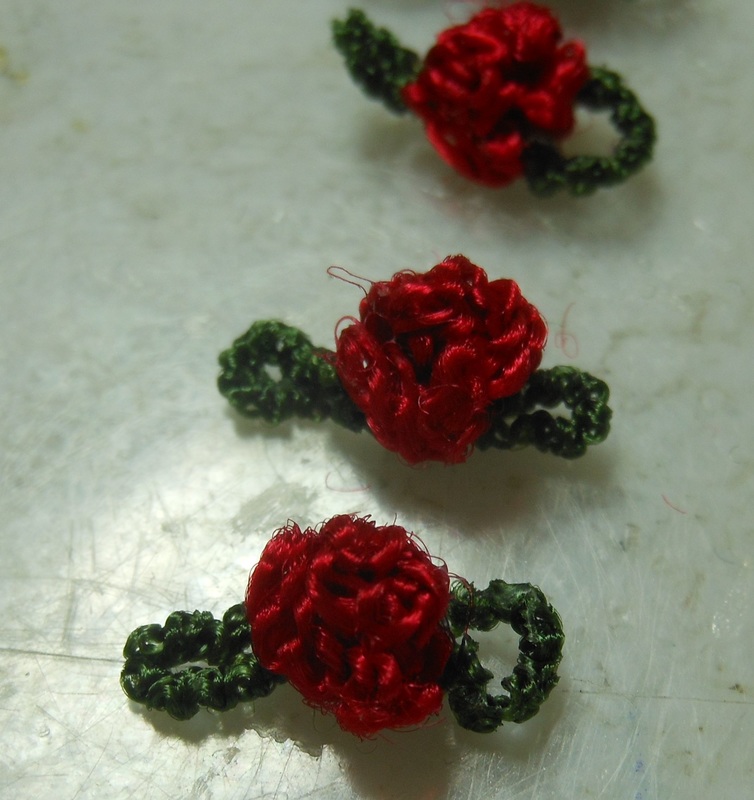
Bunka Roses: You will need at least 5-7 of these roses. Take your raveled green bunka and cut it in ½” pieces. Fold the cut ends into the center and glue so you have two loops. (Tip: if you stick these to a piece of plastic with a tiny dot of glue and let dry, they will be easier to work with.) Place a dot of glue in the center of your green bunka. Stick a long pin or similar tool into glue and catch one end of the raveled red bunka and twist 2-3 times onto the pin. Place another dot of glue at the tip of the pin and lay the tail of the bunka in it. Cut the bunka and place the pin on top of the glue dot you made in the green bunka. Gently slide the red bunka onto the center of the green bunka and glue down. Set aside and start next rose. Make as many as you desire to decorate your baby. I used three for the wings, one for the baby’s head, one for the front of her dress, and 2 for her booties.
|
|

|
|
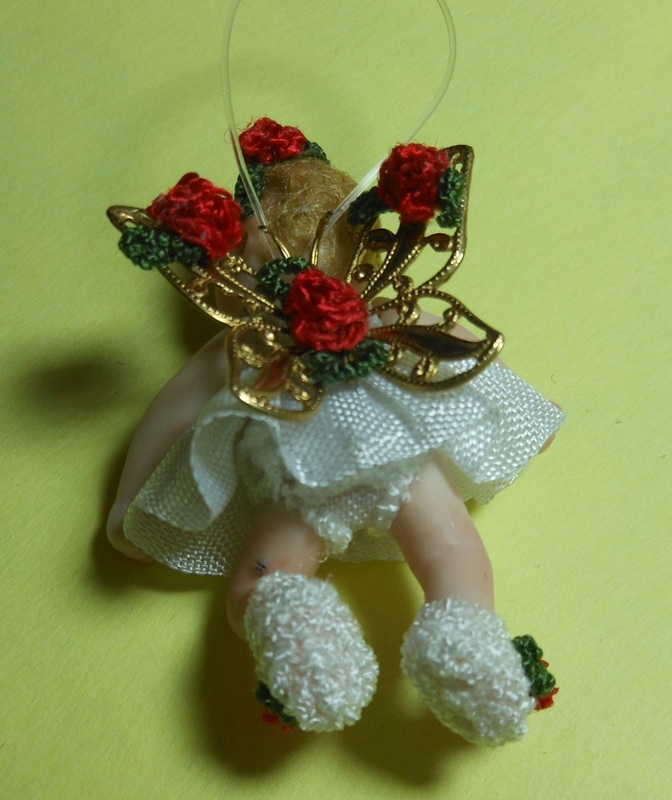
Ornament Hanger: Cut a piece of heavy fishing line about 3” long. Fold it in half and make a knot near the end leaving a tail of around ½” inch to glue onto babies back from neck to center back.
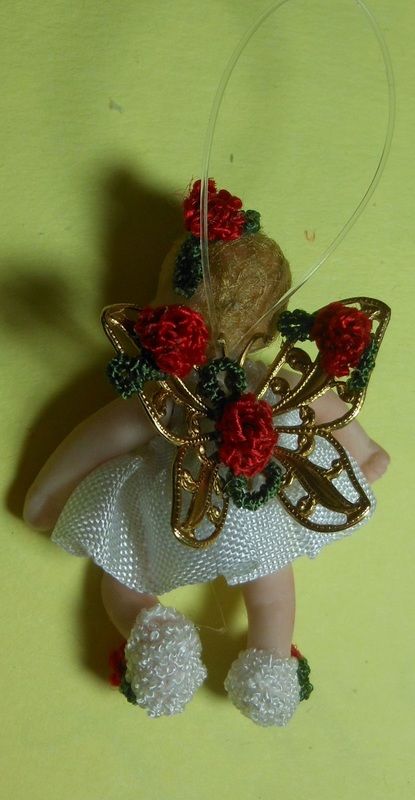
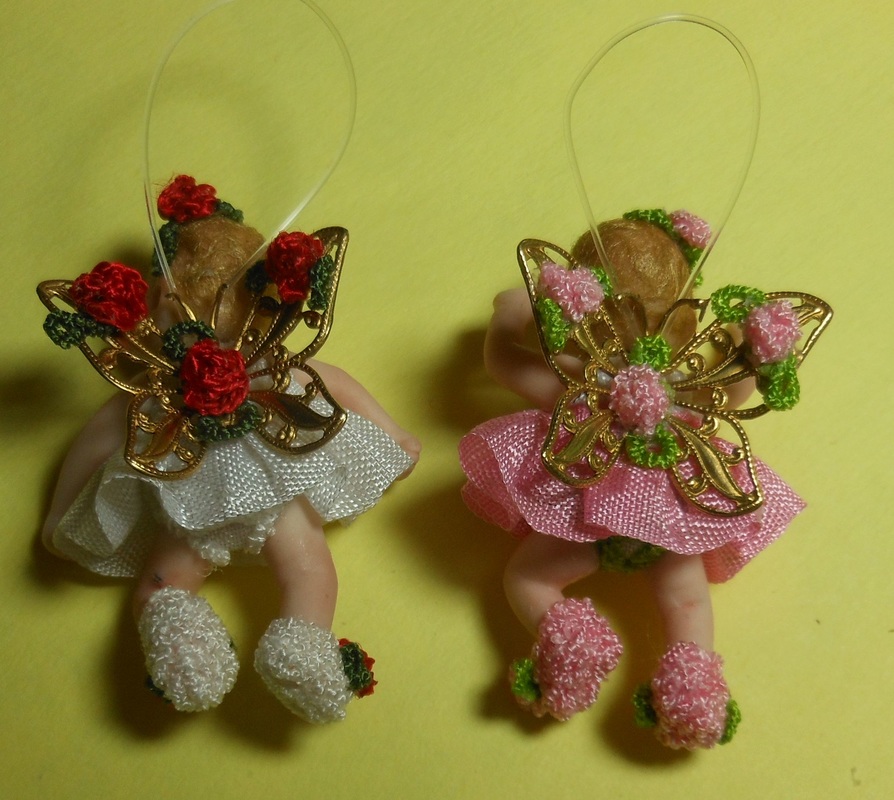
Wings: First you will need to snip the antennas loose from wing parts and bend upward. Hold center of butterfly (body) with needle nose pliers and bend wings gently and slightly upward. Decorate wings with a flower on the body and one on the tip of each wing. Glue the body of the butterfly to the center of the dress back of baby using white glue topped with a bit of super glue over hanger line. Let sit to dry.
Option Pacifier: Use a sequence for the base and a small seed bead for the handle or glue a jump ring to the sequence and top with a 2mm half pearl. Glue them on top of each other. Add a dot of white glue and then a dot of super glue to the mouth of baby. Drop sequence on top of glue and let set until dry.
Tip: Change colors of Seam Binding and bunka to make seasonal baby fairies! Enjoy!

|
|